As we’ve spoken before, Reels can be an important part of your business’ social media marketing strategy.
This is a step-by-step how-to guide to getting started with Reels. I will be using my Fonts of Summer Reel as a case study.
1. Start with audio
The audio you choose will determine the maximum length of your Reel. Choose an audio track that is too short for your video clip and your video will be cut off.
In my case, I was creating a video to fit the audio so I chose an audio clip which was 15 seconds long and fit my theme of summer.
Then I had to decide how long I wanted each video clip to be. I decided that I would make them equal with 5 clips, 3 seconds long. This would give the viewer enough time to read the text that I put on each slide, but not long enough for them to get bored and click away.
I also could have gone with 6 clips at 2.5 seconds long but I only wanted to feature 5 fonts.
2. Choose your audio.
You can definitely film your own video but, in this case, since the video was simply meant to evoke a mood, I chose stock video from Pexels.com . Since the audio was fun and upbeat, I looked for videos of people having fun and dancing, but still maintaining a bit of a dreamy vibe.
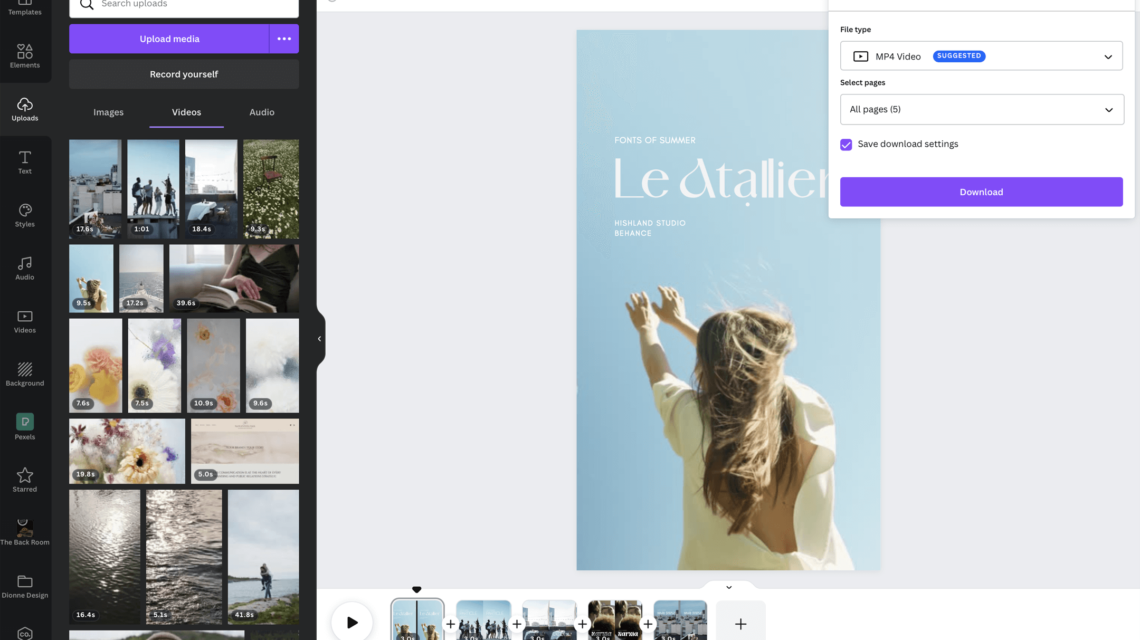
I downloaded the five videos I chose from Pexels and uploaded them to Canva.

A note: If you are using Canva, Pexels photos and videos are integrated and can be used directly from within Canva. However, I find that the search returns different results. For instance, searching “summer” on the Pexels website returns different results than “summer” on Canva. I’m not sure why that is but just something to be aware of. Also, if you do not have a pro version, you will be limited on which photos and videos you can use through Canva but there is no limit on Pexels.com.
3. Create your video in Canva.
There are many apps that you can use to create your videos, including editing them together right in Instagram, but I like to use Canva on my desktop.
4. Adjust the timing for each clip
When you add a video to a slide in Canva, it will automatically adjust the timing of the slide to the length of the video clip. In some cases, the video clips were 15 seconds which was way too long.
5. Add text
Add text to your slides, keeping in mind that text that is too far to the top and bottom will be cut off in the feed view.
If you want the text to stay in the same place on each slide and for only the video or photo to change behind them, position the text where you want it on one slide and then copy and paste the text to the following slides; the text will stay in the same position on each one.
6. Export as a video file
Preview your video using the Play arrow at the top of the screen. After you have you video as you would like it, click Share, Download, and Download again, making sure that the “MP4 Video” option is selected.

7. Create a cover for your reel
Your cover is important, especially if you are planning to share it to your grid. In this case, with the square grid format, the text would be cut off on the grid. I tested this out by creating a square and placing it in the middle of the screen. You can see that in this case “fonts of summer” would be cut off on the grid and the rest of the text would look misaligned.
From within Canva, I just duplicated the slide that I wanted to use for my cover and moved the text down so that it would look nice on the grid and not be cut off. I deleted the square that I had created as a guide and exported just that one page as an image by making sure the download file type was set to PNG.
8. Post on Instagram
Transfer the video and the cover image to your phone and then open Instagram and create a Reel, choosing the music that you selected at the beginning.
Watch your Reel through a couple times with the music to see if there is anything you would like to tweak. Some music has different beats which should synch up with your transitions so it may take a few tries to make it all work together.
Don’t forget to add a caption! This is an important space so make sure you utilize it, if possible also including a call to action.
And that’s it!
You’ve published your first Instagram Reel for business!


No Comments